The Big Box Grill Aisle Checklist
How to Read Any Grill Before You Buy — and Spend Smart, Not the Most
Read it once at the kitchen table, then take it with you to the store. The 90-second inspection and the printable checklist on the last page are built to use standing right in front of the grill.
It's written for the cook heading into the Father's Day and post-July-4th sales — whether you're buying your first grill or finally replacing the one your granddad handed down.
Why Most Grill Money Gets Wasted
I can't walk past a grill without putting my hands on it. I've been doing this a long time, and here's what I see every summer: forty grills lined up on the wall, prices running from eighty bucks to two grand, and most folks pick one in about ninety seconds. They grab the shiniest box with the biggest number on the sticker, load it in the truck, and three years later it's a pile of rust in the corner of the garage.
That's the problem this guide fixes. A grill is a multi-year tool, not an impulse buy. The good news is you don't need to spend the most to buy well — you just need to know what to look at and what to ignore. Spend two minutes reading the metal instead of the price tag and you'll walk out with a grill you won't have to replace.
This isn't a 'buy the expensive one' pitch and it isn't a brand-bashing rant. It's how I'd shop the aisle if I were standing right next to you, heading into the Father's Day and Fourth-of-July stretch when every big box store rolls out its grills. By the end you'll have a 90-second inspection you can run on any grill, a quick guide to the fuel types, and a printable checklist for the store.
Read the Build Before the Price Tag
The single most important thing you can do in the aisle costs nothing: tap the metal. Run your knuckles along the lid and the body and listen. Thin steel sounds tinny and hollow. Thicker steel sounds solid and dull. That sound is telling you how long this grill will last — thin metal rusts out in roughly two to five years unless you keep it garage-kept, and it warps and leaks heat long before that.
Next, close the lid and look at how it sits. A lot of the cheaper grills don't seal — you can see daylight at the seam, or the lid rocks. That gap matters more than people realize. When a recipe tells you to hold 250 degrees, you can't hold it on a grill that leaks, because most of your heat is escaping through that gap instead of cooking your food. A tight lid is half of temperature control.
After that, check the details that separate a five-year grill from a ten-year one: look for 304 stainless steel, a double-walled lid, clean tight welds, and parts that fit together without gaps. Heavy cast-iron or thick stainless grates beat flimsy thin wire every time. None of this is on the marketing sticker — you find it with your hands and your eyes.
Always get the one with wheels — and if you're between sizes, size up. A grill you can't roll out easily is a grill that stays covered, and you never know how many people you'll end up feeding. I'd take the 26-inch kettle over the 22-inch every time. A couple more dollars now saves you a second grill later.
"I want you to see how thin that metal is. That tells me it's going to rust out in two to five years."
Match the Fuel to How You Cook
There's no single best fuel — there's the best fuel for how you actually cook. Be honest with yourself about that before you spend a dime. If most of your cooking is burgers and dogs on a Tuesday night, you want speed. If you love a long, lazy weekend cook, you want heat retention. The grill that fits your real life is the one you'll keep using.
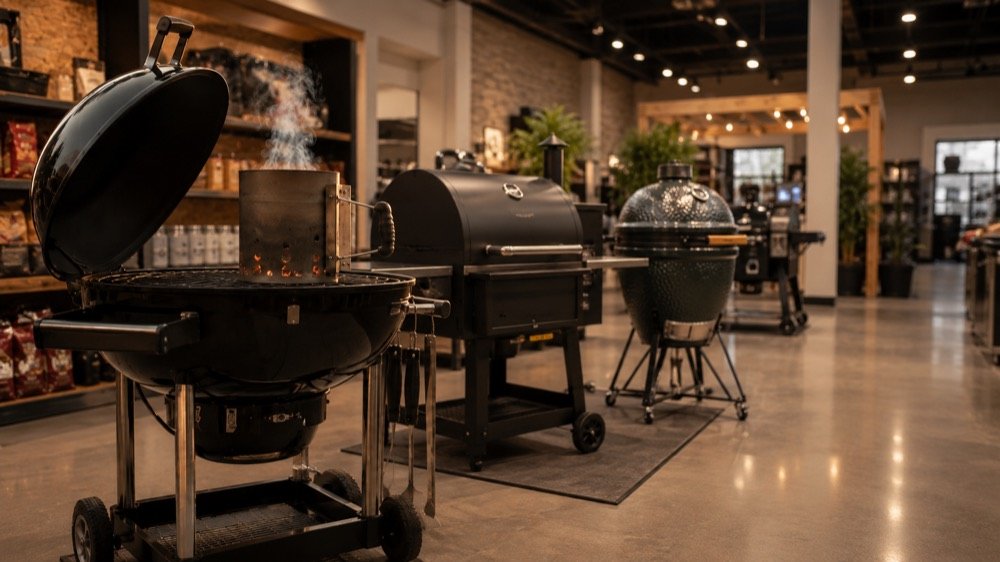
Gas is hard to go wrong with for everyday cooking — the heat is there the second you want it, and your fuel source is always at the ready. It's my pick for quick weeknight food. Charcoal kettles are my all-around favorite for flavor and control; learn the airflow and a good kettle will outlast almost everything else in the aisle. Kamados hold heat like nothing else and shine on long cooks. Pellet grills are the set-and-forget option for smoke, though many still run thin, so keep one covered.
Use the quick guide below to match the fuel to your cooking before you ever look at a price.
| FUEL | BEST FOR | WATCH OUT FOR | TYPICAL LIFESPAN |
|---|---|---|---|
| Gas | Weeknight speed; burgers and dogs | Thin lids leak heat; keep a full tank ready | 2–10 yrs by build |
| Charcoal kettle | Flavor and control; all-around use | Learn the vents; get the wheeled version | 5–10+ yrs |
| Kamado (ceramic) | Heat retention; long, low cooks | Heavy and pricier; size up if you can | 10+ yrs |
| Pellet | Set-and-forget smoke | Often thin metal; keep it covered | 3–8 yrs |
The 90-Second Aisle Inspection
Once you know what you're cooking on, every grill in the aisle gets the same quick test. This is the routine I run, in order, and it takes about a minute and a half per grill. Do it and you'll feel the difference between the units instantly.
- Tap the lid and body. Solid and dull is good; thin and tinny is a rust problem waiting to happen.
- Close the lid and look for gaps. A tight seal holds temperature; a leaky one fights you all cook.
- Check welds, seams, and grate material. Tight welds and heavy grates signal a grill that lasts.
- Confirm it has wheels and that they roll. Then size up if you're on the fence.
- Ignore the headline BTU number. Aim for roughly 80–100 BTU per square inch over a lid that seals — a tight lower-BTU grill beats a leaky high-BTU one.
Yes, and if the only grill in your budget is a thin-metal box, buy it anyway — just keep it covered and out of the weather, and plan to add a gasket kit to seal the lid. A cheap grill that's protected and sealed will outlive an expensive one left out in the rain. Buy smart for where you are, then take care of it.
Budget Tiers and When to Buy
Money is the part everyone gets backwards. The cheapest grill is usually the most expensive one you'll ever own, because you buy it twice. For anyone who cooks more than a handful of times a year, the mid-range is almost always the smarter spend. Here's how I think about it by budget.
| BUDGET TIER | WHERE TO LOOK | WHAT YOU GET |
|---|---|---|
| Under $250 | Big box store (Lowe's, Home Depot, Ace) | A solid starter — run the inspection and buy smart |
| $300 – $750 | A local welder | A tank build that holds heat for long cooks |
| $1,000+ | Custom fabrication | A lifetime rig — do your research first |
Timing matters almost as much as the grill. Father's Day and the lead-up to the Fourth of July bring real promotions, but rarely the deepest ones. The best deals start the day after the Fourth and run through late summer, with Labor Day usually the lowest prices of the year as stores clear the floor. The rule is simple: buy now only if you need it now — otherwise, the patient shopper saves real money.
Set It Up Safe — and Skip the Lighter Fluid
A few setup choices save you money and keep the cook safe. The first one: stop buying lighter fluid. It's the bonfire stuff — it can leave a chemical taste and cause flare-ups, and you're paying for it over and over. Spend about $24 on a charcoal chimney starter and grab a few fire cubes. You'll light cleaner, faster, and cheaper for years.
If you're going gas, treat the propane with respect. Always leak-check the fittings with a little soapy water — bubbles mean a leak — store the tank outdoors and upright, and never bring it inside. A simple tank gauge is a lifesaver so you don't run out in the middle of a cook.
And because build quality is really about holding the right temperature, keep a probe thermometer in the conversation. Cook to safe internal temperatures, not to the clock: poultry to 165°F, ground meats to 160°F, and steaks, chops, and roasts to 145°F with a 3-minute rest. Don't leave cooked food at room temperature for more than two hours — one hour if it's above 90°F outside. A good grill makes hitting those numbers easy; a leaky one makes it a fight.
Common Mistakes in the Aisle
Almost every wasted grill purchase comes down to one of a handful of mistakes. Watch for these and you'll dodge the regret that sends people back to the store in a couple of years.
- Buying on the BTU number. People think a bigger number means a better grill. It doesn't — makers pad that figure with side burners. Aim for 80–100 BTU per square inch over a lid that seals.
- Choosing the thinnest, cheapest box. It looks like a smart, frugal buy, but thin metal rusts and warps fast. Tap the metal and choose thicker steel that'll still be here in ten years.
- Skipping the wheels to save a few dollars. It seems minor, but a grill you can't move easily is one you'll stop using. Spend the couple extra dollars on the wheeled cart.
- Buying the smaller size to save money. Most people cook for more than they expect over a grill's life. If you're between sizes, size up — you can't add cooking area later.
- Using lighter fluid. It's habit, not strategy. A chimney starter and fire cubes light cleaner, taste better, and cost less over time.
Printable Pre-Purchase Checklist
Tear this page out — or pull it up on your phone — and run it on every grill you're considering before you swipe a card. If a grill fails the first four checks, walk away no matter what the sticker says.
- Tap the lid and body — solid and dull, not thin and tinny?
- Close the lid — does it seal flush, or can you see gaps and daylight?
- Check welds and seams — tight and clean, not gapped?
- Look for steel grade — 304 stainless and a double-walled lid hold heat best
- Confirm wheels — present, and do they roll and/or lock?
- Size up — choose the larger cooking area if you're between sizes
- Ignore the headline BTU — aim for ~80–100 BTU per square inch
- Check the grates — heavy cast iron or thick stainless, not flimsy wire
- Ask about assembly — included, paid add-on, or on you?
- Ask about replacement parts and warranty length before buying
- Add a chimney starter and fire cubes — skip the lighter fluid
- For propane — pick up a tank gauge so you don't run out mid-cook
- Know your budget tier before you walk in (under $250 / $300–750 / $1,000+)
Take the Whole System Further
This checklist gets you out of the aisle with the right grill. The next step is getting the most out of it for years — and that's where the full system comes in. The premium guide, The Complete Grill Buying System, goes deeper: a fuel-type decision matrix, the full inspection broken down point by point, the deal-timing calendar so you buy at the lowest price of the year, and a first-cook setup so your new grill earns its place the very first weekend.
Whatever you end up buying, take care of it, cook on it often, and reach out anytime — I'm happy to tell you where to spend and where to save. That's the whole point of this channel.
Free guides & resources: www.backyardbbqr.com
Watch the full walkthrough: youtube.com/@BackyardBbqR
Questions about a specific grill? Email backyardbbqr@gmail.com — I read them.
"Spend smart, not the most." — Mr. B, Backyard BBQ-R
Run it yourself and let Mr. B know how it goes.